
As many of you know, we recently moved into a new house. Even though it is a brand new house, there are a million things to do to get settled in. I’m not just talking about actual unpacking of boxes but trying to figure out where everything will go. A new house means a new layout and that means that every room needs to be designed with our current decor and new things I pick up to compliment what I already have.
I know you all are waiting for an official house tour, and believe me, that is in the works. Don’t worry because we have something fabulous planned that will “welcome” you into our home. But you have to wait for that!
Today, I’m going to give you a quick teaser in one of the rooms and share with you a DIY project that we just tackled. Yep, we just moved in and we are already doing “projects”!
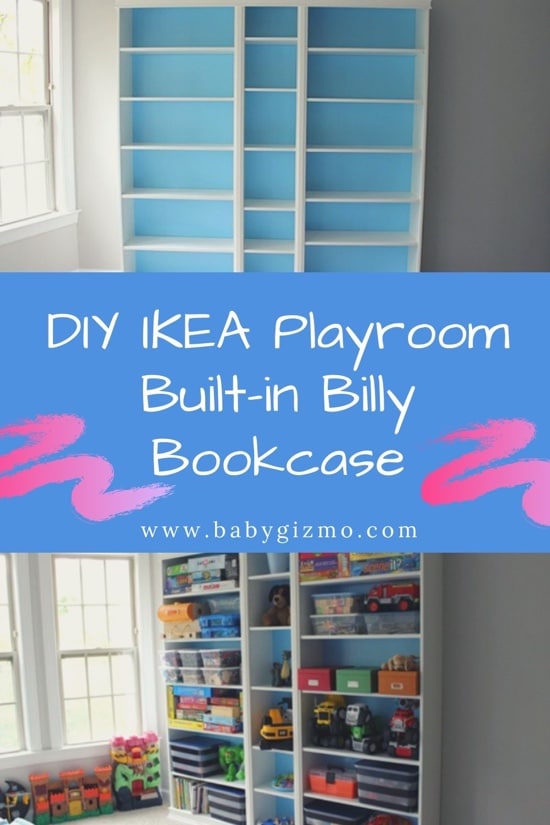
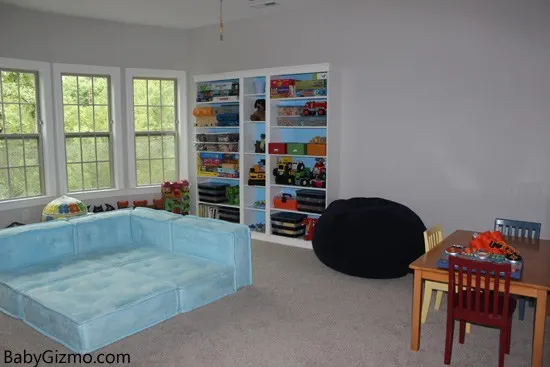
In our new house, we have an entire room dedicated just to toys. That’s right, we have a playroom and this isn’t a small room by any means. It’s a big, beautiful room, with a glorious wall of windows, and tons of space to spread out. There lies the problem. There is so much space that my kids spread out all their toys everywhere. From the first week we moved in, that playroom was a mess. Completely unacceptable in my new, organized world!
You see, I promised myself that when we finally moved that I would get my act together and be more organized. Everything would have a space. There would be organizational decor everywhere to help keep me on track. There will be no more missing “hat day” at school because of a lack of a family calendar. No more searching for the car keys because we’ll have a key holder. I have been telling myself that I am going to get my act together and keep this family on track.
It just happens to be that we started with the playroom. Why? Because this room is my kids go-to room in the morning to play and watch TV when they wake up at the crack of dawn and I just want to SLEEP! It is also where they hang out on rainy days and play video games or board games. It needs to be a fun room but I just can’t handle it being a tornado of mess any longer.
It wasn’t completely their fault at the beginning because we just didn’t have enough shelves and places to put all the games and toys. We have toy boxes but those become catch-alls that my 5-year-old constantly dumps out just to find that one red Matchbox car that he had to have. We have a Land of Nod cube organizer and bench with fabric containers to store toys but it just isn’t enough.
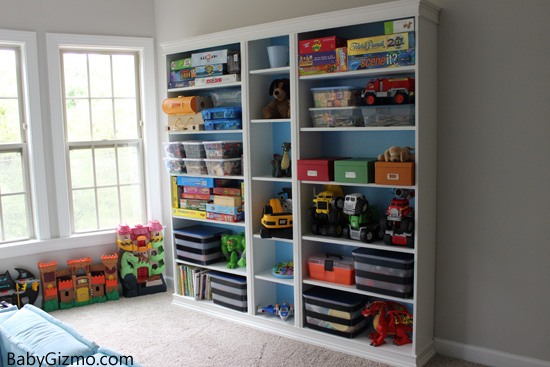
We needed more shelves for books, games, trucks, cars, Legos and the other millions of things that needed to be put away.
When we were building the house, I had wanted built-ins in this room but when I heard that it would cost us $2500, I abandoned that idea. Until now. We decided to do our own “built-ins” or huge bookshelf. I didn’t want to spend a fortune and I didn’t want it to be ugly.
I found the perfect compromise on the Centsational Girl blog! We turned the standard Ikea Billy Bookshelves into “built-ins” and did it all in one day! The Billy Bookshelves are super boring and cheap looking all by themselves but add some fancy trim, paint the back boards, and mix up the shelves, and you have something fabulous! You might not count them as “built-ins” technically because they don’t span the entire wall and give you that built-in look, but they look pretty great.

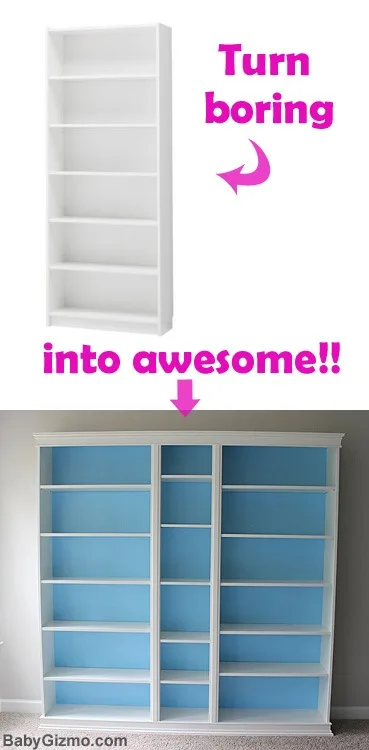
We now have all the shelves we need in the playroom and it cost us a total of less than $300.
What you need:
- Ikea Billy Bookshelves in White
- 2 – 12” sections of the trim of your choice
- 2 – 8” sections of trim for the center
- 1 quart paint (color of your choice for the back board)
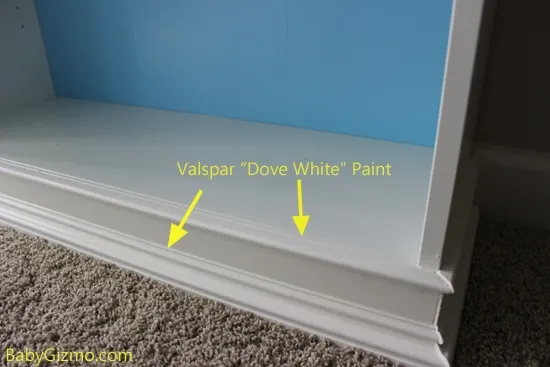
- 1 quart Valspar “Dove White” paint from Lowes
- 1 – 8” piece of 1×4 board
- 1 – 8” piece of 1/4″ skinny trim
- Paintable chalk
- Finishing nails
- 4 – 3” bolts with washers and nuts
HOW TO BUILD PLAYROOM SHELVES
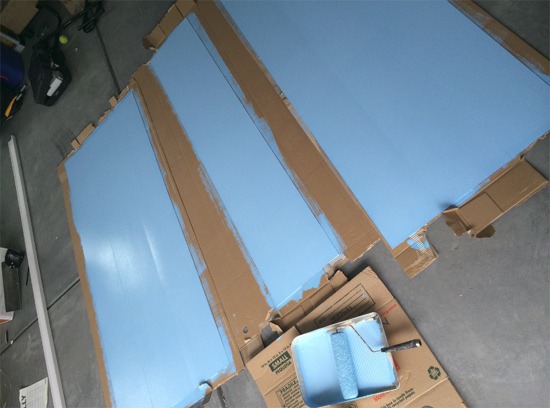
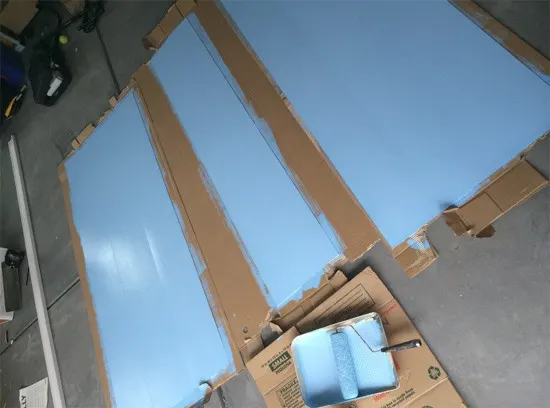
1. Remove everything from the Ikea boxes. Unfold the backboard of the shelves and lay onto a large, covered surface and paint one side of the backboards. Any color will do but we chose light blue in semi-gloss.
2. While the backboards are drying, assemble the Ikea Billy Bookshelves according to the directions. Do not add in shelves yet! When the backboards are dry, slide them in per the directions.
3. To give the illusion of a “built-in” bookshelf, we screwed the three bookshelves together with 3″ bolts, washers and nuts. Lay all three bookshelves down on the floor side by side and bolt them together with two bolts at the bottom and two bolts at the top. We pre-drilled the holes so that bolts just slid right in.
4. Stand the total bookshelf up and secure against the wall to prevent tipping. The Ikea shelves come with L brackets.
5. We thought we needed more wood to attach the trim to on the top of the shelves, so we added 1×4 pieces. We cut and added a 1×4 board in a u-shape to the top of the bookshelf. We secured it to the bookshelf with finishing nails from the top. No need to paint that board because the trim will completely cover it.
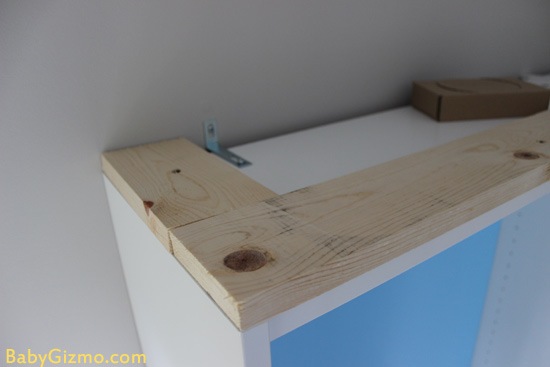
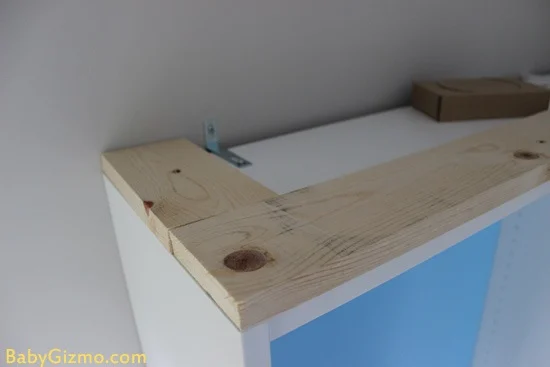
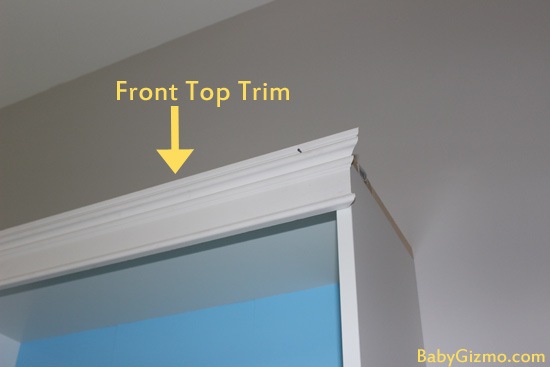
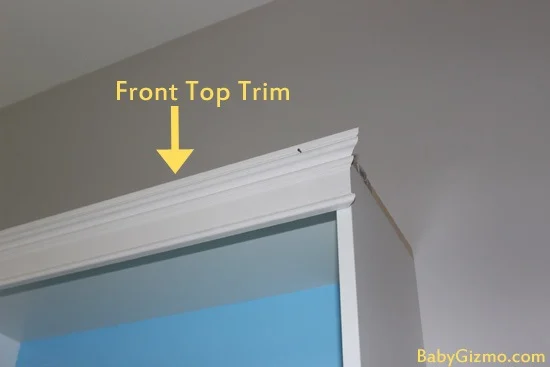
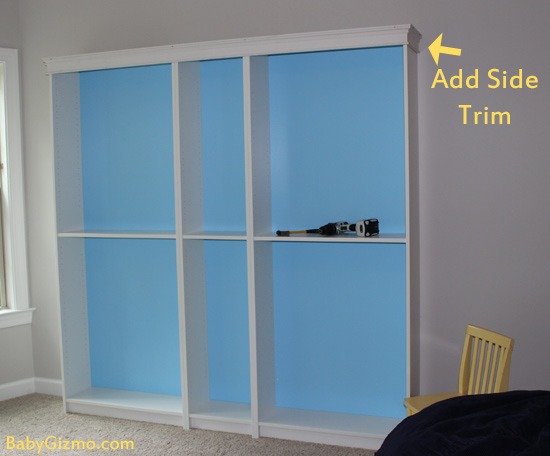
6. Cut the decorative trim to fit the top and sides of the bookshelves. The front trim piece was cut to 79 1/2″ and the two side pieces were cut to 12″. Make sure to cut the corners to an angle cut so that they go together. We nailed the trim into the top 1/4 board with finishing nails and then patched the top of the nails with wood putty to cover them.

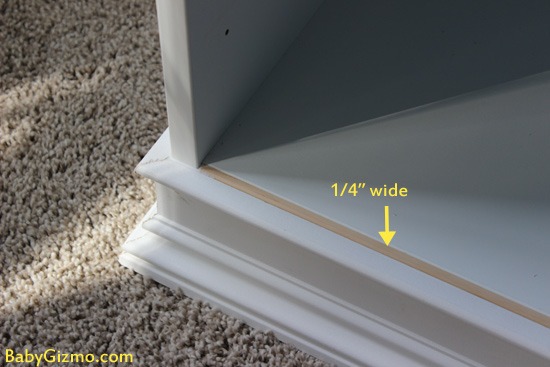
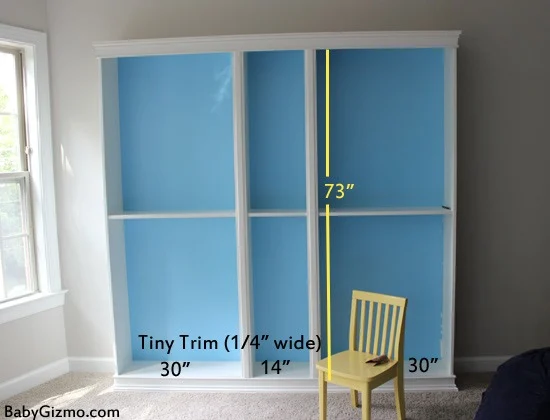
7. Repeat the trim at the bottom. Same cuts but make sure to flip the trim around so that the fatter side sits on the ground. There will be a very small space between the bottom of the bookshelf and the bottom trim. To close that gap, we cut three 1/4″ wide pieces of trim to fit into the spaces. Those cuts are 30″, 30″ and 14″. It fit PERFECTLY!! You will paint that when you paint all the trim and you’ll never notice it again.

8. Finally, it is time to add the center trim. You can just use a plain, flat 3″ wide 8′ board that is cut to 73″ but we opted for a piece of fancier trim to complement the trim at the top and the bottom. Cut the trim and center it over the pieces where the separate bookshelves meet to make it look like all one piece. Nail it to the bookshelf with finishing nails.

9. Add your shelves in. Use paintable chalk to cover any gaps in the trim or imperfections. Using Lowe’s Valspar “Dove White” paint, you need to paint all the trim to finish off the bookshelf. This paint matches the Billy bookshelf almost perfectly, so no need to paint any other part of the bookshelf.


10. That’s it! And the total project including the Ikea shelves was less than $300. The fun part was organizing all the games and toys on the new bookshelf “built-in”.

Now if my kids will just keep it that way!! 🙂
Deborah
Wednesday 5th of December 2018
I have read A LOT of these DIY for the Billy bookcase and this is bar far the simplest and best instructions I have seen. The bookcases look great!!! Can wait to start on my own!
Kathleen
Friday 16th of December 2016
Hi, where did you find those see-through striped toy baskets?
Tricia
Sunday 4th of December 2016
I'd love to know which "sheen" of the Dove White paint you purchased to match? Ie, semi gloss, eggshell, etc? Thanks so much!
Tina Bower
Tuesday 17th of May 2016
What size trim did you use on the top and bottom? Thank you!
Sharon
Friday 11th of September 2015
What color trim did you use in this room? The Billy bookcases seem to be a yellow white so I was curious how they match your trim. S